
Hikvision IP camera and Recorder setup
Hikvision IP camera and Recorder setup

With these instructions we help you to take the first steps to set up your new camera or recorder, so that it becomes visible in your browser via the network
Hikvision IP camera/recorder setup - In six steps
Step 1 – Start Up
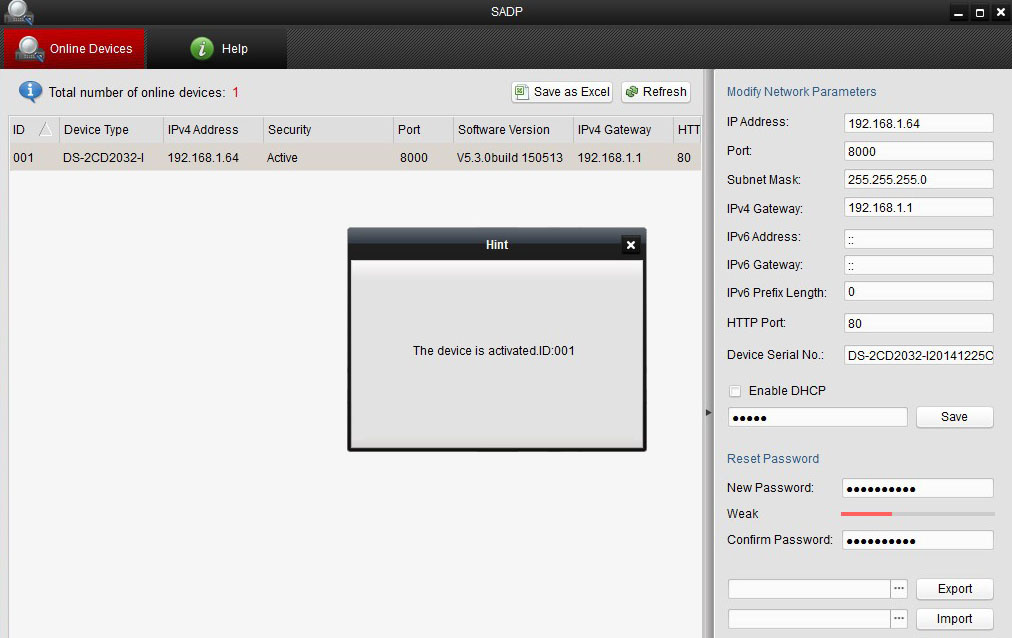
Plug the camera or recorder into the network switch or router and make sure that the camera is powered by a POE adapter or another power source such as a 12-volt power supply. Download the SADP program from the Hikvision site or take the CD that came with your camera and recorder and insert it into the computer. Open the folder named 'SADP' and then double-click 'SADP Setup' to start the installation. When the installation is complete, the program will start automatically and will display all Hikvision devices that are connected to your network.
With the latest Hikvision cameras and recorders, you must first activate this camera or recorder by creating a strong password that consists of at least 8 characters. If you check the camera or recorder in SADP, you can enter a strong password at the bottom right. After you have done this, the message "device is activated" will appear.
Step 2 – Find Default Gateway
Next, you need to find the 'Default Gateway' for your network. Go to the 'Start' menu, type 'cmd' in the search bar and press 'enter'. This will open a control window. In the window, type 'ipconfig' and press 'enter'. This brings up information such as your IP address and Default Gateway.
Make a note of the series of numbers listed to the right of 'Default gateway', you will need this later.
Note: Your Default Gateway may differ from the one in the picture, this is normal. 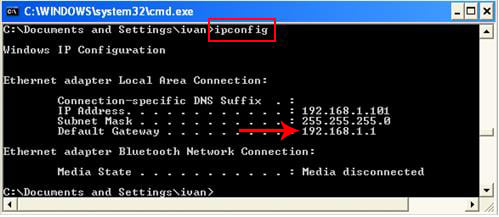
Step 3 – Set network parameters
Now that you have noted the Default Gateway, you can return to the SADP program. Select your camera by clicking on it. You should now see 'Network parameters' on the right side. In the 'IPv4 Gateway' field, enter the number of your Default Gateway. 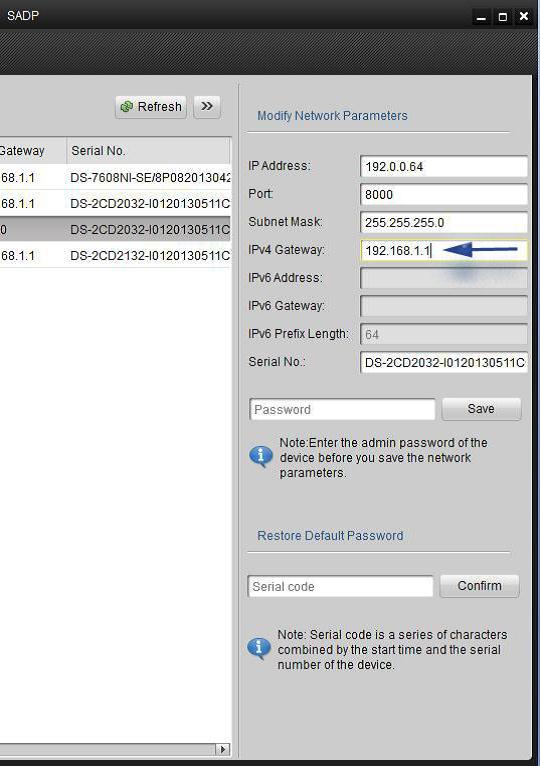
Step 4 – Assign IP address
Then an IP address must be assigned which corresponds to the default gateway. Example: The default gateway is 192.168.1.1 which means that the IP address can be a series of numbers as long as it stays within the 192.168.1.x format. Keep in mind that you want to make sure that the IP address you choose isn't already being used by something else; a number like 100 and above usually works well.
If you have chosen an IP address, enter it at the top in the 'IP address' field. Then type in your chosen password and save the settings. 
Step 5 – Login
Open your internet browser and type in the IP address you just selected for the camera in the browser bar and press 'enter'. You are now on the login page, enter the default username (admin) and password and click on 'Log in'.
You will now see a screen with a link to a Plug-in download. 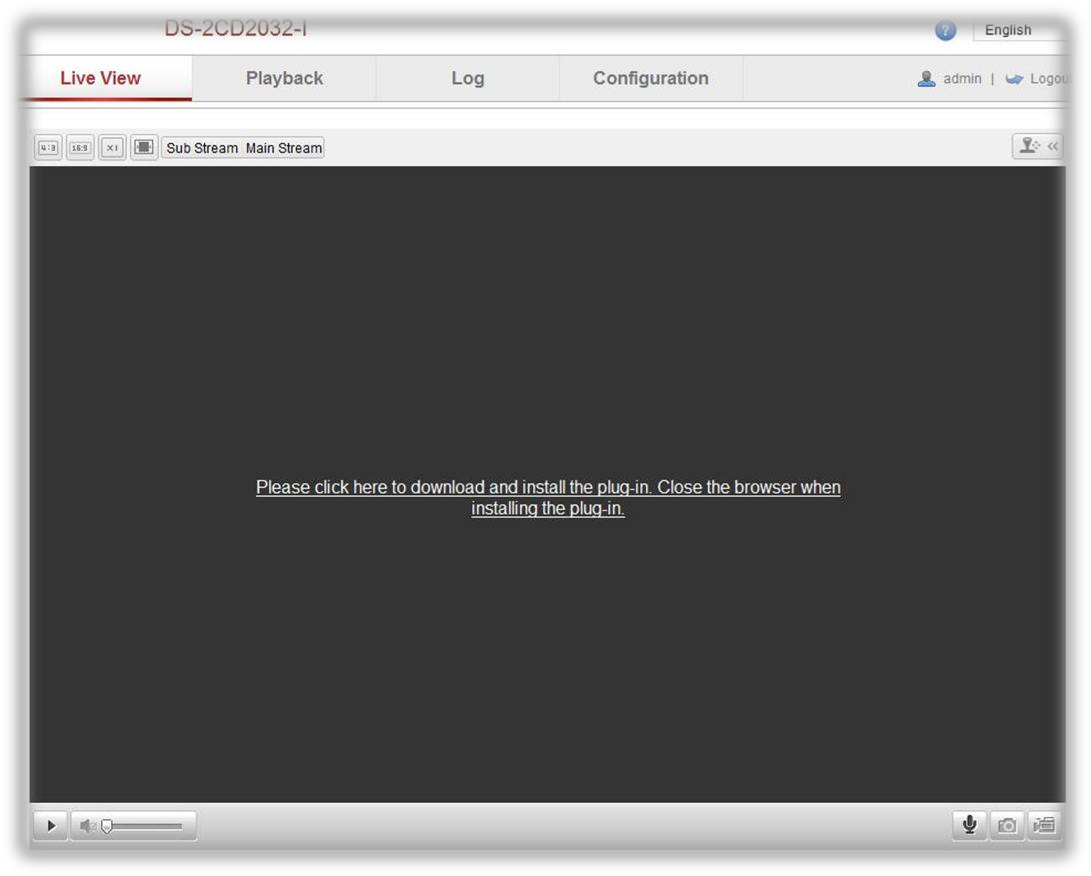
Step 6 – Download Plugin and Login
Click on the link to download the plugin. When the plug-in is downloaded, you can close the browser. Close the entire browser, not just the tab.
Find the plugin (usually in the 'Downloads' folder), open and install it. When the installation is complete, open the internet browser and type in the chosen IP address for the camera in the internet browser and press 'enter'. You are now on the login page. Log in with your username and password so that you can view the images live.

